18 holes for 18 exceptional environments in the heart of the 5 valleys of the private Bercuit estate. A change of scenery guaranteed!
Each hole has its own particularities, requiring golfers to play both technically and athletically. Take up the challenge and discover this emblematic course, before relaxing on the magnificent Club House terrace.
Men’s records
Amateur : P. Relecom – 66
Pro : M. Smith – 63
Ladies’ records
Amateur : A. Van der Haegen – 69
Pro : K. Orum – 66
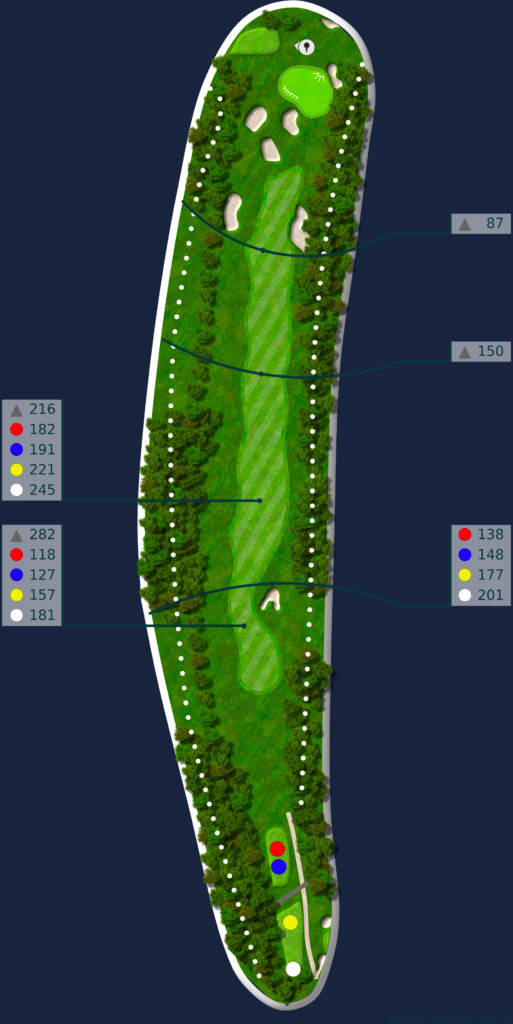
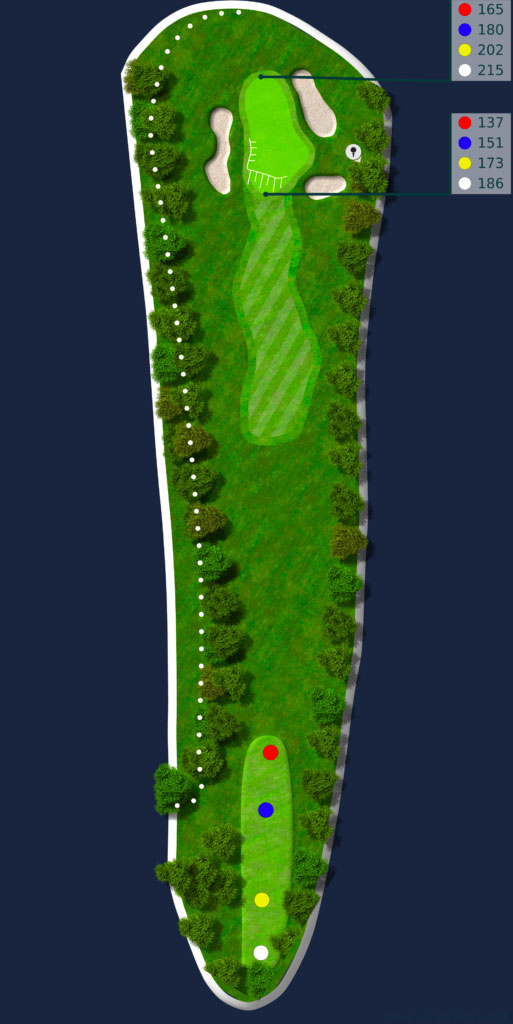
Hole #1
Par 4
Hcp 7
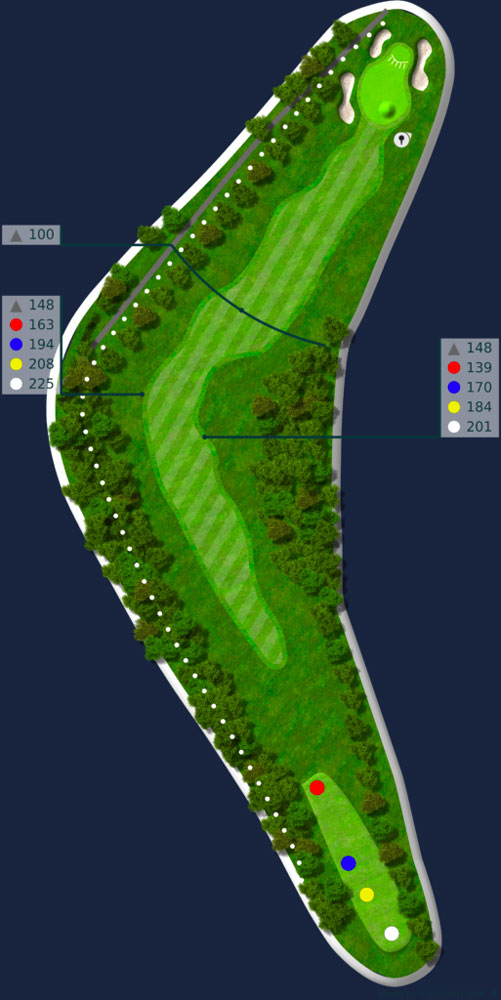
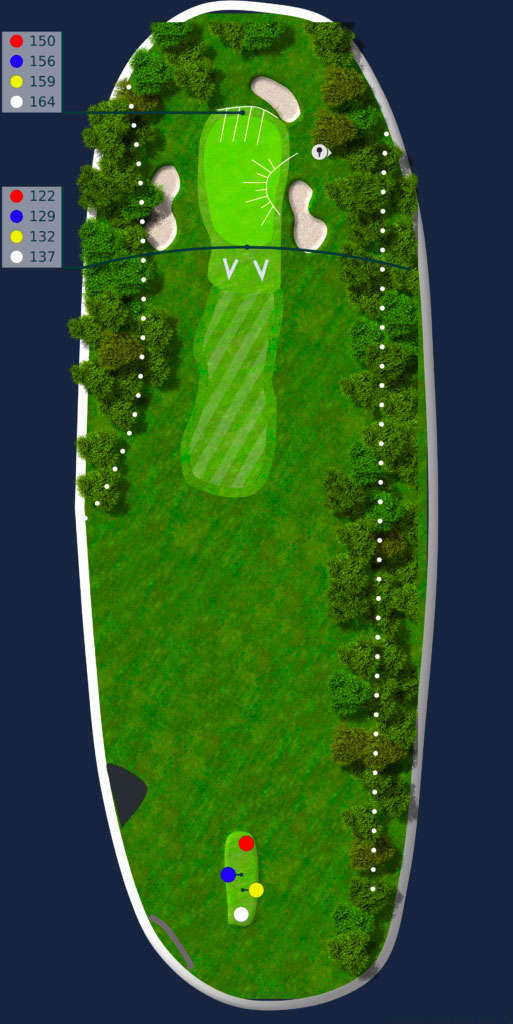
Hole #2
Par 5
Hcp 13
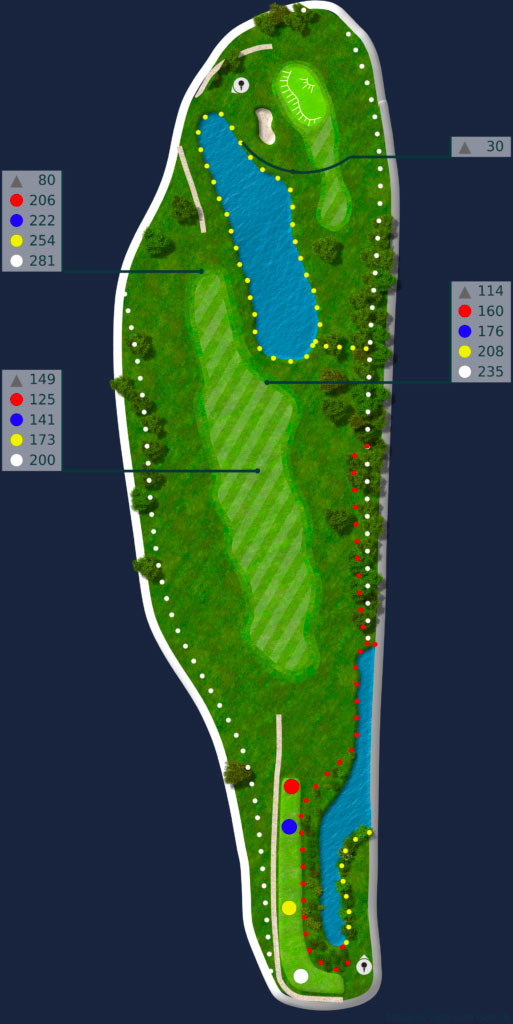
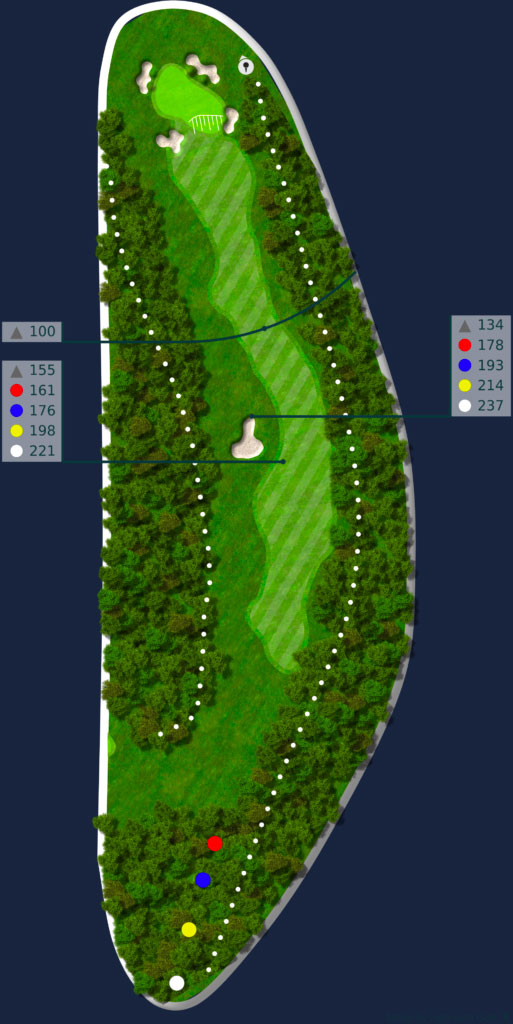
Hole #3
Par 4
Hcp 11
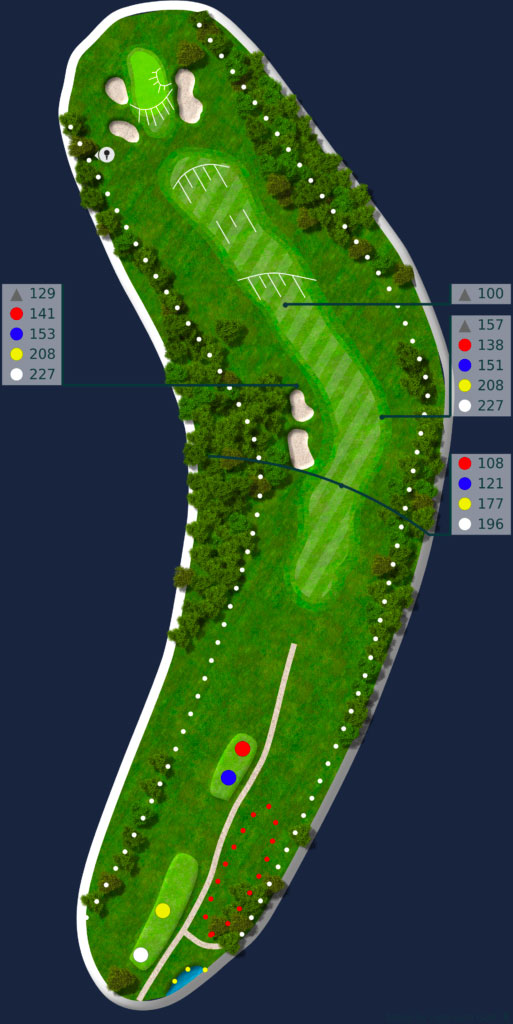
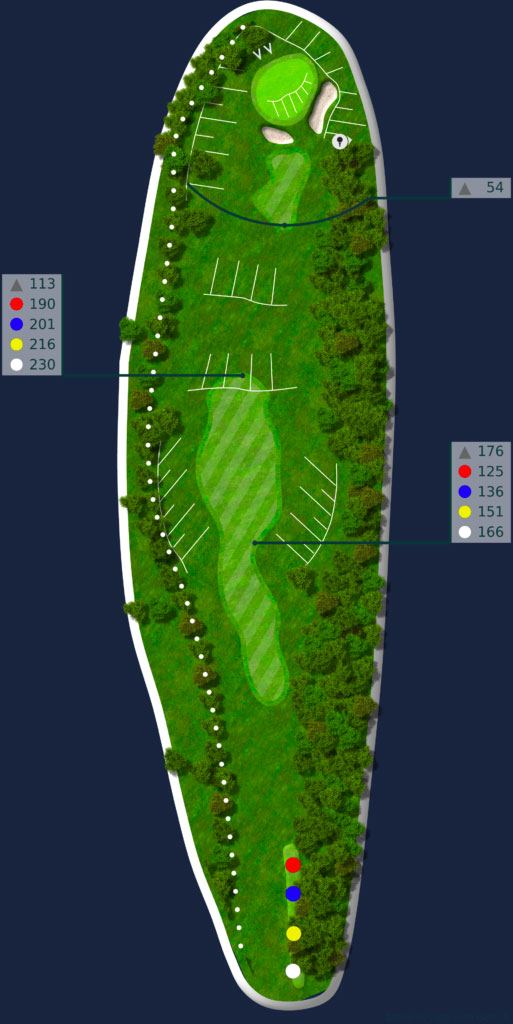
Hole #4
Par 5
Hcp 17
Hole #5
Par 3
Hcp 15
Hole #6
Par 4
Hcp 1
Hole #7
Par 4
Hcp 3
Hole #8
Par 3
Hcp 9
Hole #9
Par 5
Hcp 5
Hole #10
Par 4
Hcp 6
Hole #11
Par 3
Hcp 14
Hole #12
Par 5
Hcp 10
Hole #13
Par 4
Hcp 12
Hole #14
Par 3
Hcp 16
Hole #15
Par 4
Hcp 4
Hole #16
Par 4
Hcp 2
Hole #17
Par 5
Hcp 8
Hole #18
Par 3
Hcp 18